After clicking on an Item in the overview page, the TAGS can be edited either manually or also by automatic fetching of the data. The following screen is showed:
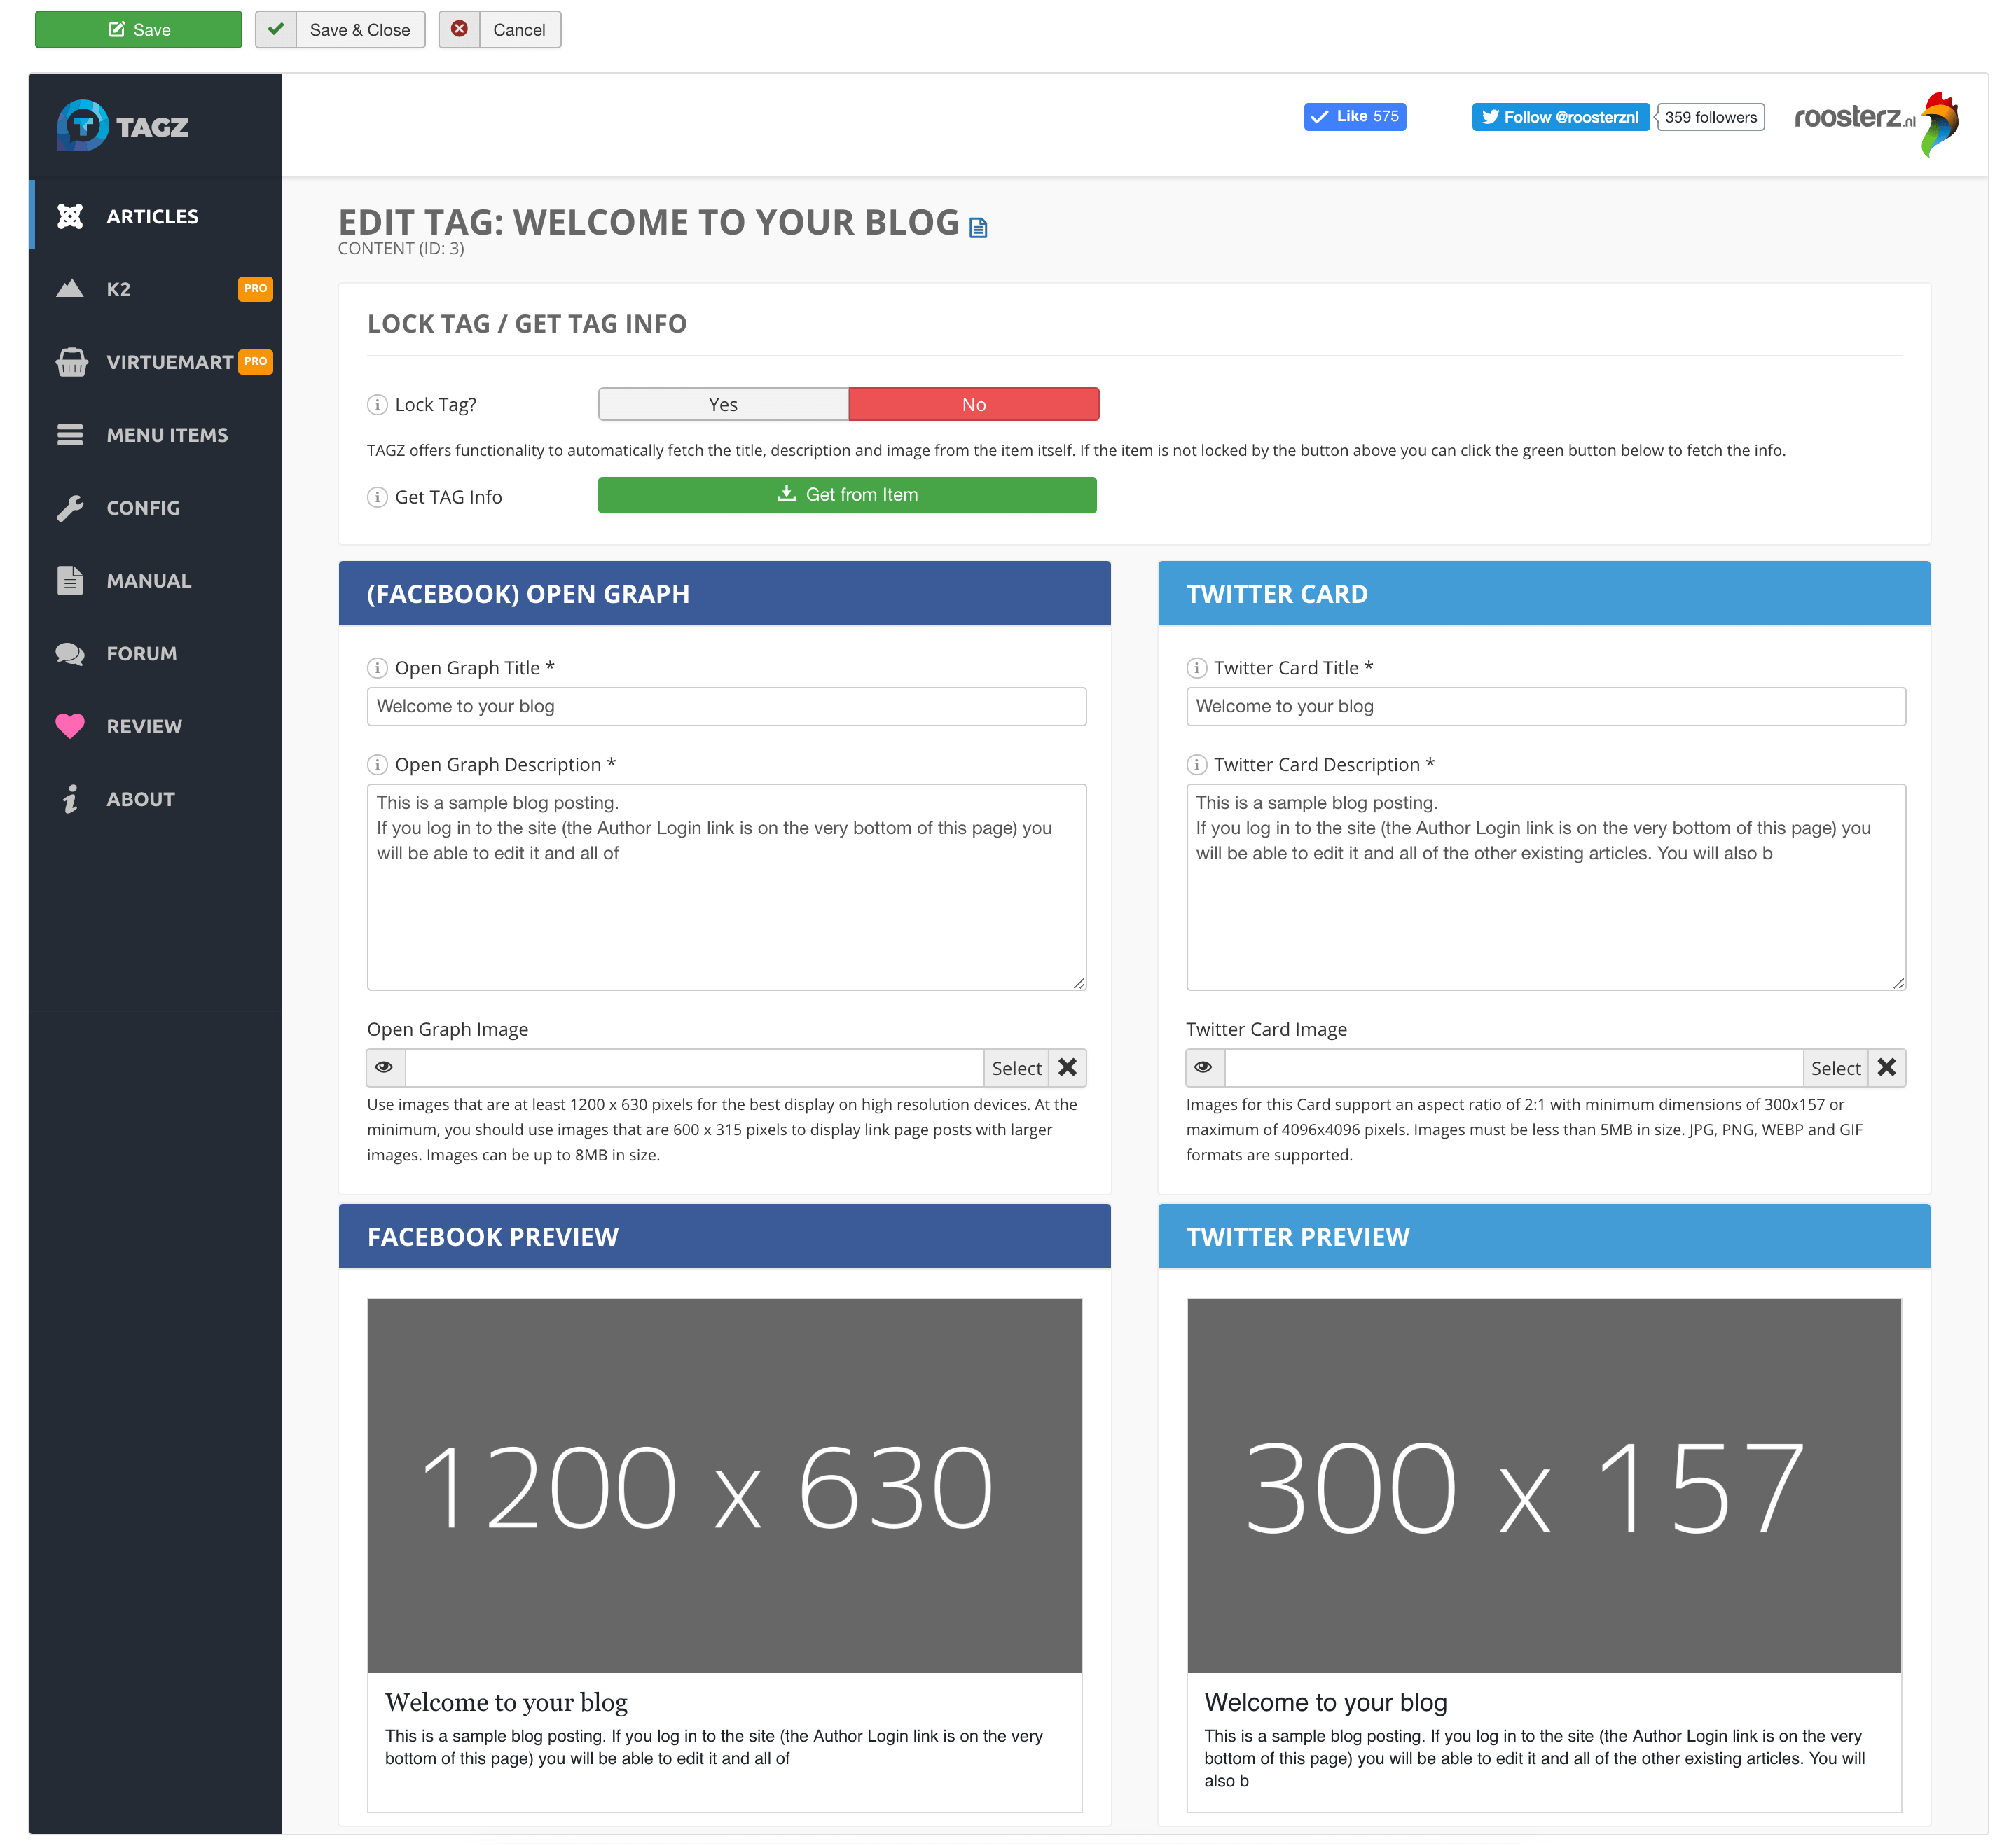
Top/down the following panels are visible:

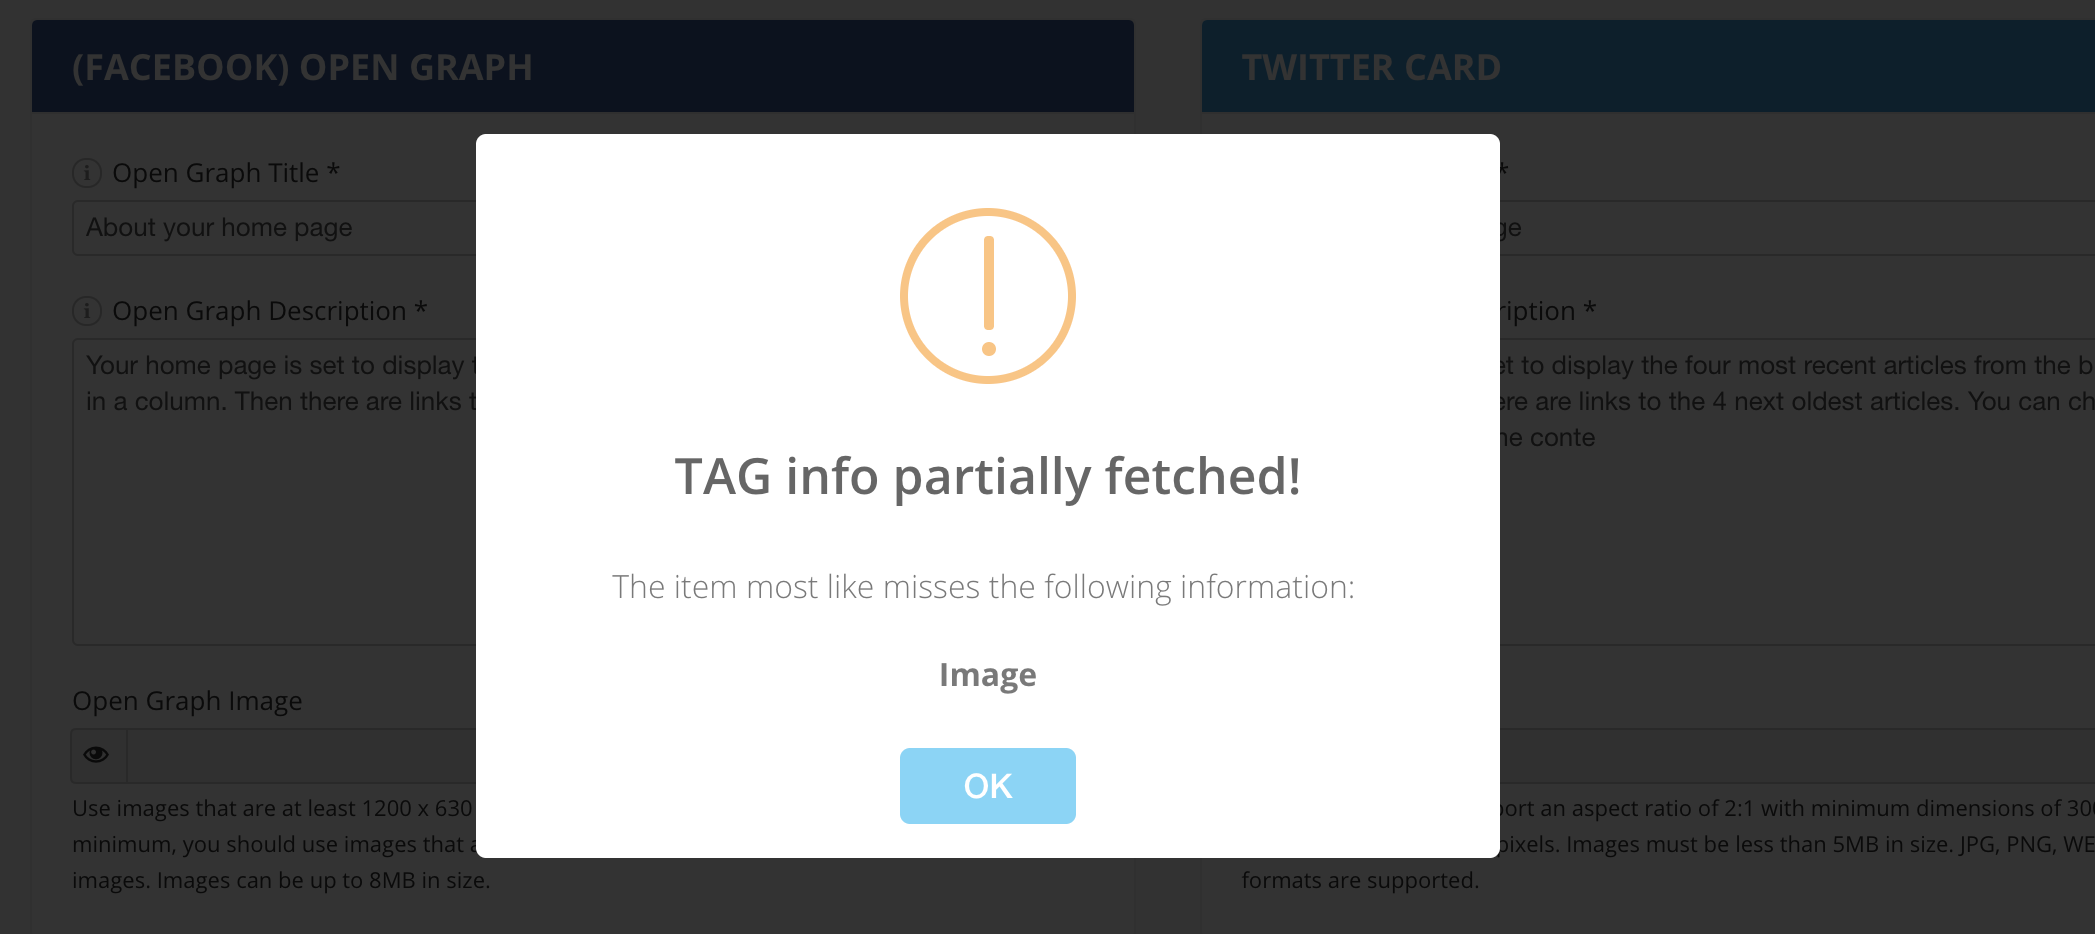
In case of number 1 everything went perfect! :-) For number 2 it seems that some information is missing from the Item. This can be a Title, Description or Image. Please check the corresponding Article, Product, etc of which you are creating a TAG or type a Title, Description / select an image manually (see instructions below).
As stated by its title the following panel is used to define the Open Graph, or og:, tags. You can either enter the information here manually or use the automatic fetching feature to populate it automatically. The following TAGS can be set:
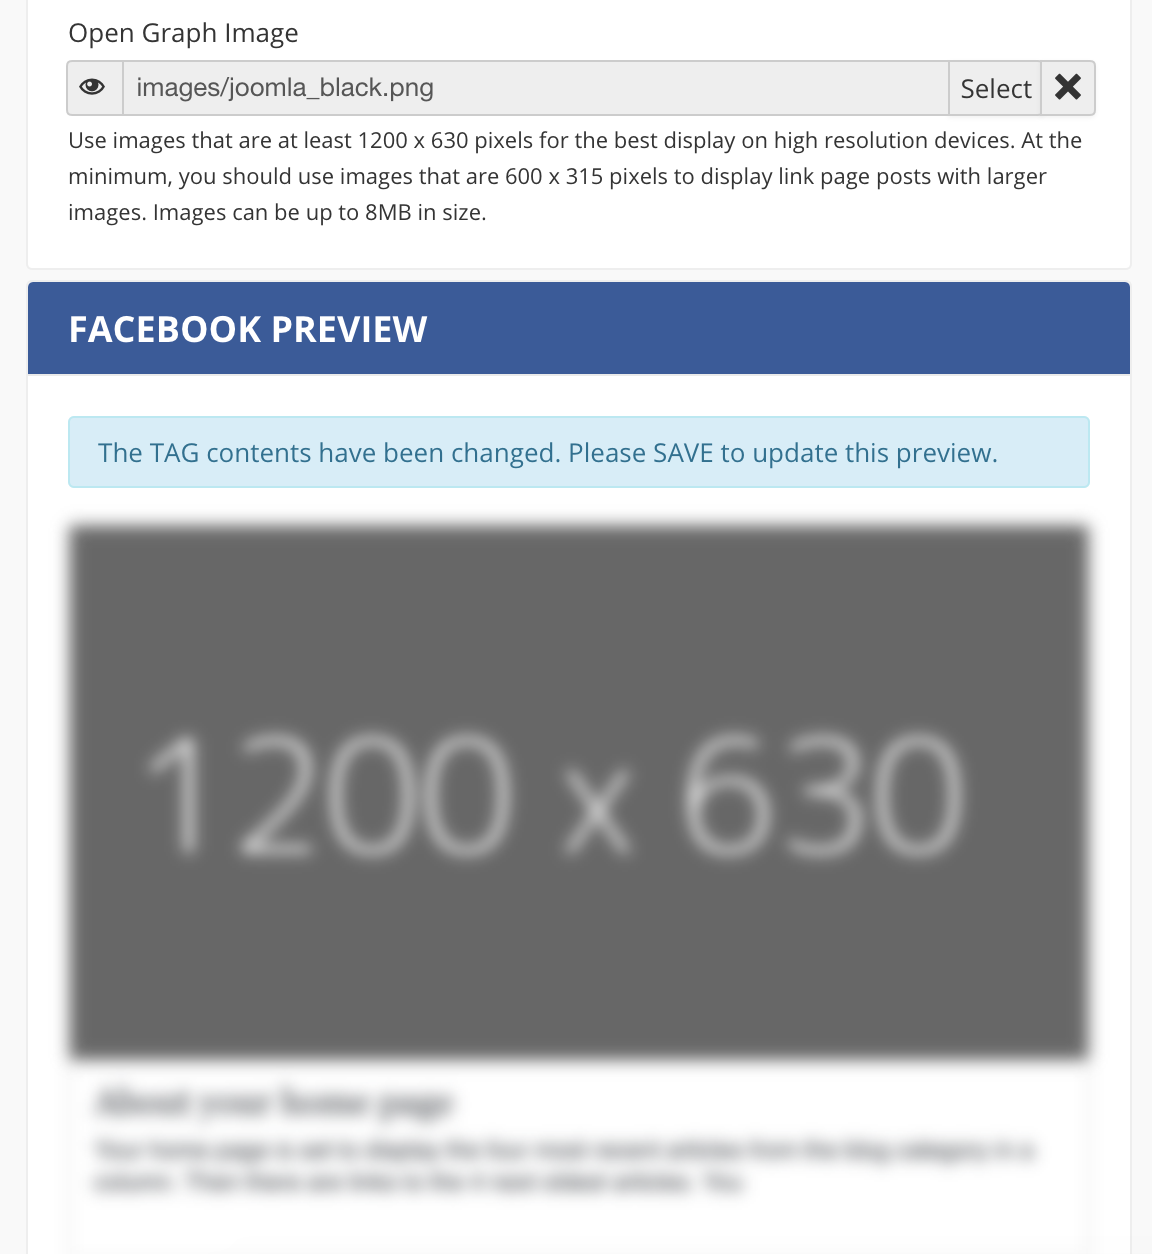
Just Save the Item, then the Preview Panel will show the updated Preview.
Please note that Facebook advises to use an image larger than 1200x630 pixels. If the selected image does not meet the minimal required width (600px) or height (315px) a warning will be displayed:
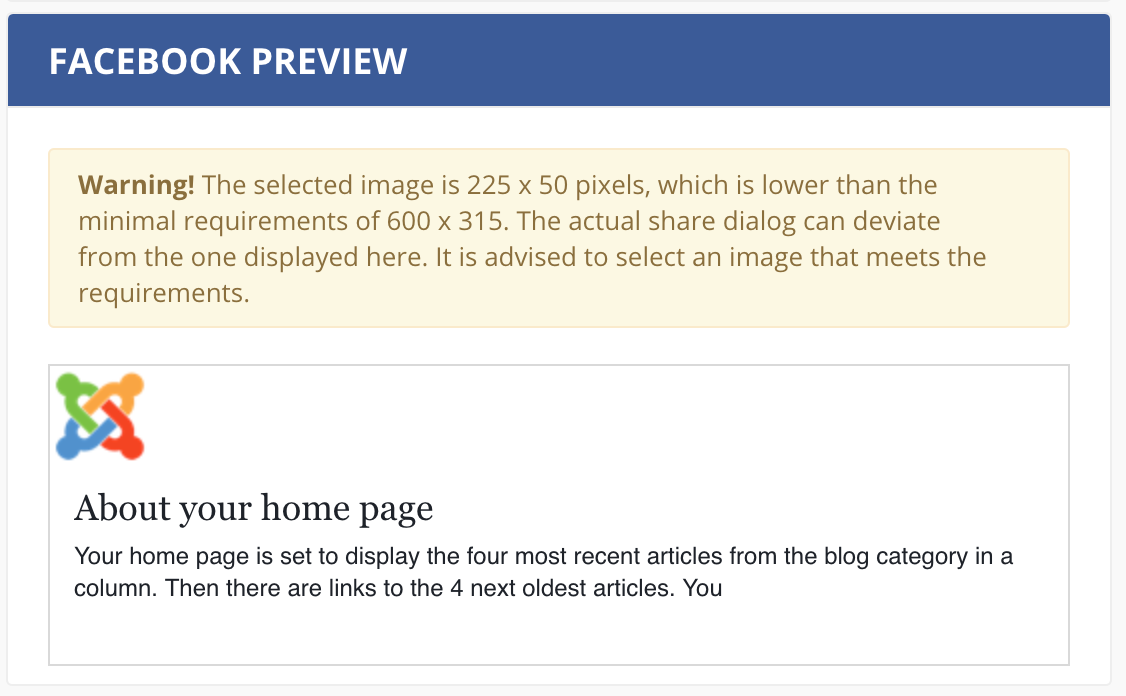
If you see this warning it is recommended to select another image that satiesfies the advised dimensions.
The Twitter Card panel fields are used to populate the twitter:card tags. The following TAGS can be set:
Just Save the Item, then the Preview Panel will show the updated Preview.
Please note that Twitter advises to use an image larger than 300x157 pixels. If the selected image does not meet this width (600px) or height (315px) a warning will be displayed.
If you see this warning it is recommended to select another image that satiesfies the advised dimensions.
All TAGS have been set for an Item now. Now what? Head over to the next page.